As an Amazon Associate I earn from qualifying purchases.
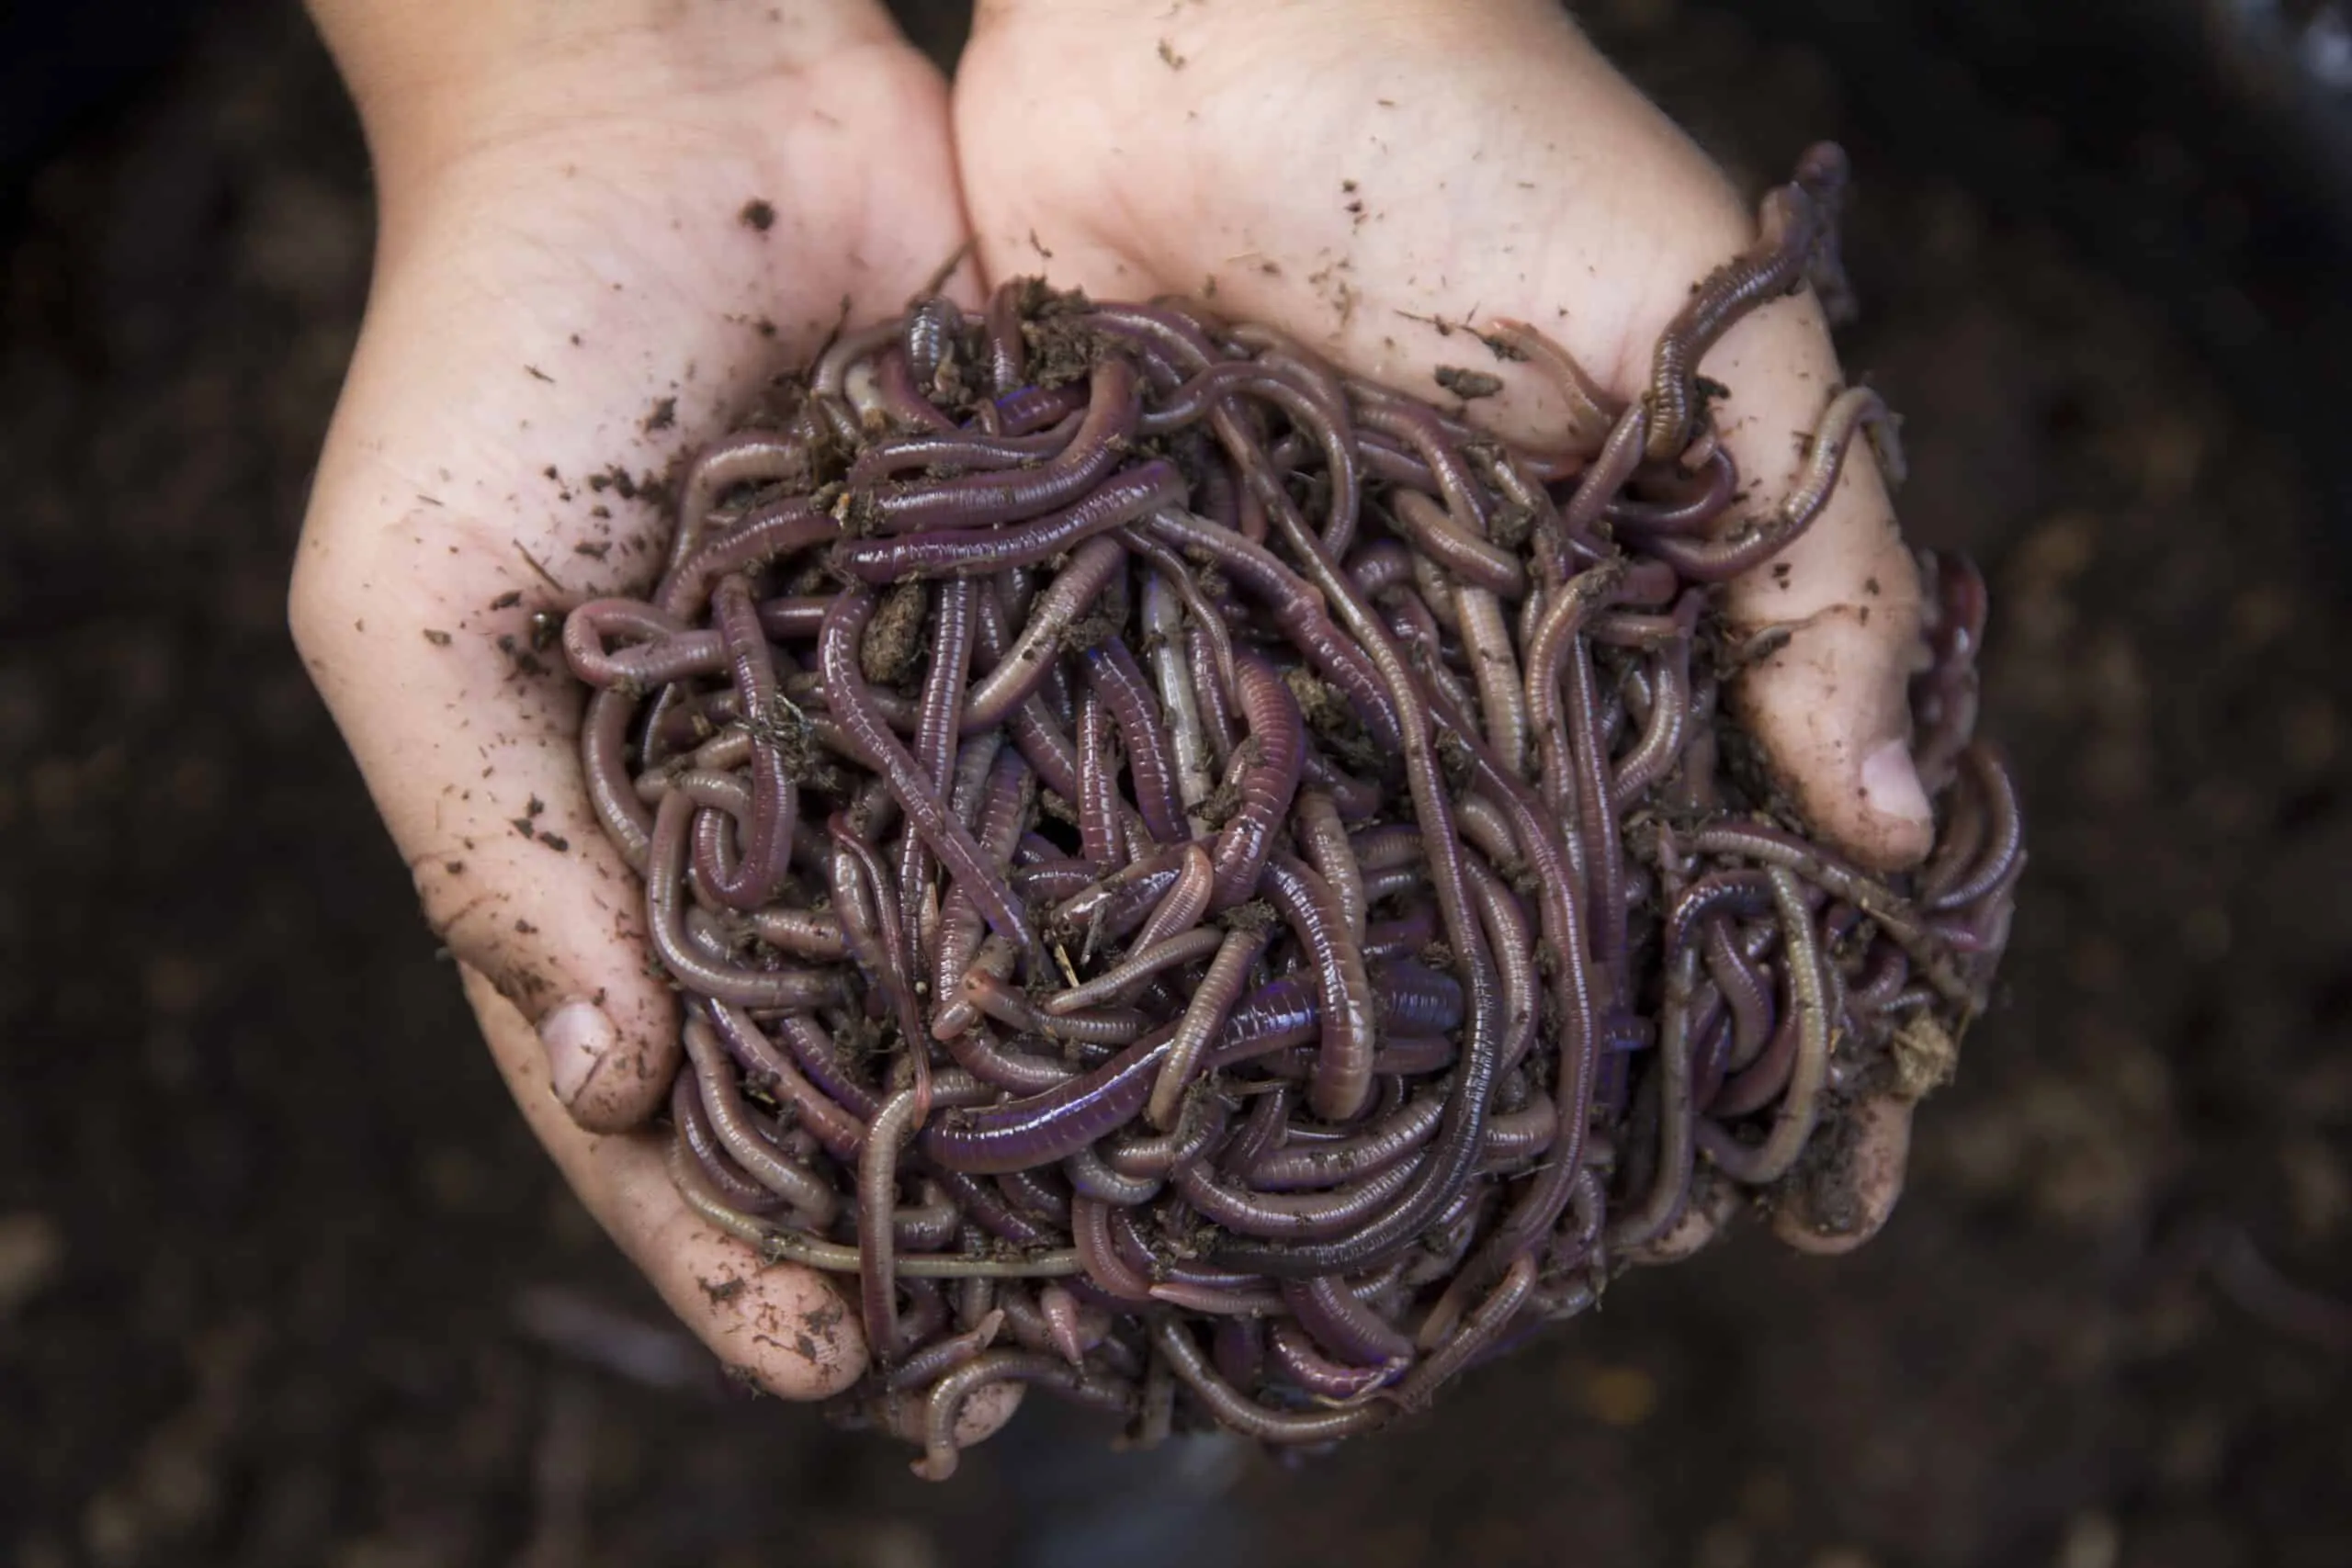
When a gardener digs into their soil and finds worms squirming around, they know they’ve got fertile grounds. These wiggly blind creatures are representative of healthy soils because of their relationship to the natural cycle of decomposition. They consume complex organic materials and turn them into plant-available nutrients infused with beneficial organisms. So when you see worms in your soil, you know that you’ve found a promising place to plant.
Vermiculture takes these principles and applies them in a controlled environment to promote the production of nutrient-rich Vermicompost or worm castings. Vermicompost is the byproduct of worms and can be efficiently produced by providing them with optimal habitat. The root word “verm” means worm in Latin, so vermiculture translates to the act of cultivating worms while vermicompost literally translates to worm compost. Vermicomposting systems can be created on any scale and are an environmentally friendly way to recycle nutrient-rich materials and produce a high-quality organic soil amendment.
Why Would You Compost With Worms?
Composting with worms is an easy low-cost way to process organic materials into a valuable resource. It has its benefits both for small-scale home production but also for larger-scale production and everything in between. While it generally takes longer than an active compost pile it is much less work-intensive and produces an extremely high-quality product.
Worm Compost is An Unparalleled Product
There are many different types of compost out there, but very few are as powerful and nutrient-rich as the byproduct of worm activity. Some call it vermicompost, others vermicompost, while some just simply call it worm compost. No matter what you call it, it’s an incredible resource that does wonders for plant growth. It’s for this reason that it’s generally more expensive than traditional compost. I love to use vermicompost to really spoil certain plants that I prize or that need a bit of an extra boost.
Benefits of Making Worm Compost Compared to Traditional Compost
- Richer in Nutrients
- Superior Quantities of Humus
- More Nitrogen Retention (nitrogen is often lost with traditional composting)
- Inoculated with extremely high quantities of beneficial microbes
- Increases germination rates in seeds
- Easy to maintain
- Less physical labor (No Flipping! Worms do all the work!)
- Production of vermicompost juices
- Practical for small homes or apartments
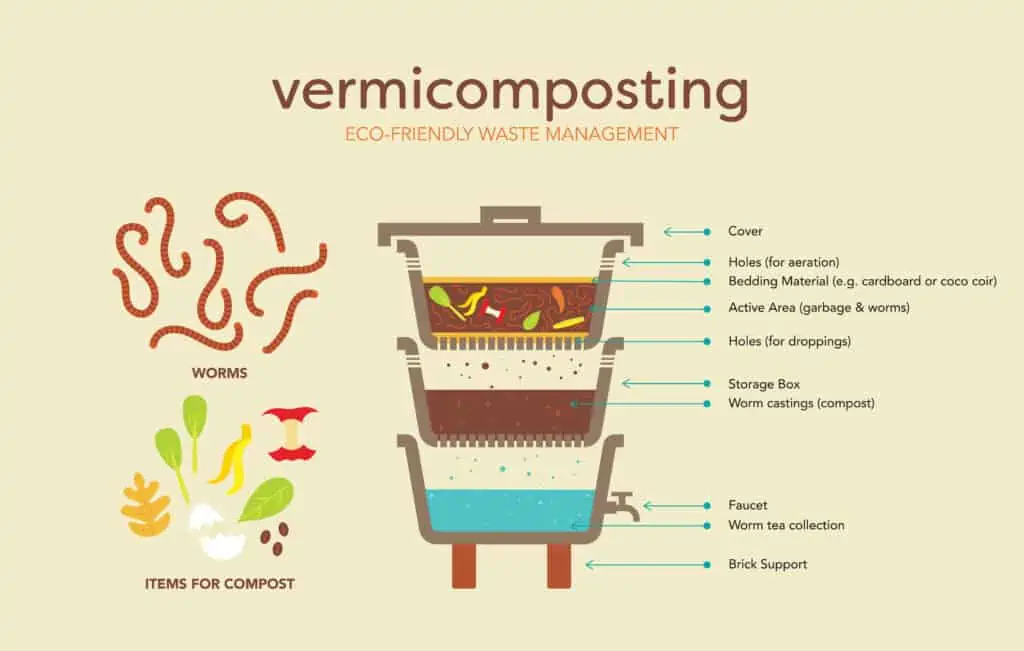
Making a Vermicompost System is easy! There are dozens of designs and unique systems that utilize the power of worms to process organic material. Most small-scale Vermicompost Systems utilize containers where worms and organic material are kept for optimum conditions.
Larger scale operations use large tubs or above-ground rows to process large quantities of material. Before we get into the nitty-gritty of designing your Vermicompost System, let’s consider what environmental conditions your worms thrive in.
Choosing The Best Worms For Vermicomposting
There are tens of thousands of different types of worms in the world, but only a handful are effective for vermicomposting. Most notably the “Red Wiggler” (Eisenia fetida) is the most effective for vermicomposting systems. In their native habitat, they live in the surface layers of soils decomposing litter and other organic matter in forests, pastures, and other productive ecosystems.
Compost worms are composed of three important components. The mouth, the gut, and the anus. The mouth is toothless but able to shovel organic material into its mouth. Before passing through the intestines it becomes physically macerated by its gizzard (like a bird) where it is mixed with grit. Adding a handful of gritty sandy soil to your system serves as a good source of grit.
The intestines are full of microbes, with approximately 1,000 times more microbial life than the food it consumes. These microbes help break down the food contents which are eventually expelled through the anus full of these beneficial microbes. Each worm can process up to its body weight a day! Red wigglers reproduce quickly, being able to double their population in about 2 months!
To get your hands on some red wigglers it might be best to find a local vermicomposting facility and see if they sell worms. They will typically sell you worms by the pound, which may include some bedding so consider that when making your purchase. You may also be able to find them in select garden stores or on the internet.
Since worms eat anywhere from 50%-100% of their body weight every day it’s recommended to start with around twice the weight of worms than your daily production of food.
You can also find red wigglers in manure piles or compost but double-check to make sure you have the right species!
Basic Needs of Composting Worms
Moisture – Worms are mostly made of water so an adequate quantity of moisture is necessary for ensuring the health of your worms. At the same time, worms breathe through their skin so excess moisture can interfere with their respiration. Excessive moisture also promotes the growth of harmful microorganisms that are detrimental to the health of your worms and product. It is much easier to hurt your worms from excessive moisture than not enough. In general, you want to keep your moisture content at around 50-70%.
Air – Worms can’t survive in the absence of oxygen. For this reason, they thrive in well-aerated soils and organic materials. They breathe through their skin whose efficiency can be impaired from excessive moisture or oils in the food stock.
Food – Worms eat A LOT of food! While it might not seem like much, they can eat up to their own weight in food a day. They love things that have already been broken down, whether biologically or physically broken down. We will cover this in-depth later.
Temperature – Compost Worm’s ideal temperature range is between 55 and 77 degrees Fahrenheit. The maximum temperature range is from 40 to 90 degrees Fahrenheit. Outside of the ideal temperature range they work slower and reproduce less.
5 Steps To Design Your Own Vermicompost System
There are many different designs of Vermicompost Systems out there. Most small-medium Vermicompost systems are held within containers in controlled environments, while some large-scale producers make large above-ground wind-rows. For this guide, we will mostly focus on container-based systems.
1. Choose A Container Type
The container is where your worms will live. In it, you will house them, feed them, and harvest their nutrient-rich byproduct. It is important to consider your materials, size, and overall design so it best suits your needs. Containers can be diverse and range anywhere from bins, buckets, old bathtubs, wooden planter beds, cement tubs, PVC, and almost anything you could think of!
Container Basics
- You will want a tough material that can withstand excessive moisture and decomposition.
- The container should be wider than it is tall to provide adequate surface area for air exchange.
- You will need drainage (to harvest the rich worm juices!).
- A lid for your container to ward off any unwanted visitors!
- A way to raise the container from the ground so moisture can easily drain.
2. Choose The Proper Container Material
The two most common choices when it comes to choosing the material for your Vermicompost System are plastic and wood. For medium-large scale production cement is often used. Other materials are perfectly fine just make sure they are resistant to excessive moisture and decomposition. You don’t want the worms to eat their home!
Wood – Wood is the common choice for most DIY Vermicompost Systems because it’s easy to use and has a natural aesthetic. The biggest downside of wood is that within a couple of years it is likely to weaken and break down. Using more durable wood is ideal for this reason. If using recycled wood make sure it was not treated with any harmful chemicals (like those found in conventional pallets) or it may impair your worm’s health and the quality of their product.
Plastic – Plastic is a good choice because plastic containers are extremely accessible and come in a wide range of sizes. Try to find food-grade plastic and make sure that there weren’t any harmful chemicals stored in the container! Many people use 5-gallon buckets or bins for their first Vermicompost Systems.
Cement – For a larger scale production cement is commonly used to make square tubs to house the worms. These typically have a slanted floor that drains excess liquid.
Other Materials – Bamboo, Ceramic, Porsalyn, Metal, Cob, Adobe, Mesh
Avoid Using – Materials Treated With Harmful Chemicals, Cardboard, Plywood, Fragile Metals, UV Damaged Plastics.
Providing Drainage
Also keep in mind that, whatever material you use, you’ll want to have a plan for drainage (of water).
Excessive moisture is one of the common issues that amateur Vermicompost DIYers can make, so providing drainage is important! If using a plastic container you may choose to drill 1/4” holes every 4-5” on the bottom just like a flower pot.
For proper drainage it’s best to raise the container from the ground, this can be easily done with logs, bricks, or other sturdy materials.
Some choose to build their Vermicompost Systems up high with table legs for easy access and drainage. If you can’t drill drainage holes in your container, another option is to have the floor slanted and make space for drainage at the bottom of the side where moisture would accumulate.
For those who need a visual representation, here’s how a 3-bin worm system works:
3. Calculate The Size Of Your System
The right size worm bin largely depends on the quantity of waste you produce or wish to process into vermicompost. For a home system intended to process kitchen scraps, you will need to roughly estimate how much food waste your home produces a week. To properly process all of your food waste, you should account for about 1 cubic foot of space per pound of weekly food waste. This means if your home produces 5 pounds of food waste a week you will need a container about 5 cubic feet in size. So the best way to determine this is by weighing out your kitchen food waste to get a weekly average.
Shape and Dimensions
As far as shape is concerned you want a container whose top has a large surface area. This provides better air exchange than tall containers with small tops. It’s also easier to access, feed, and see what’s going on in your Vermicompost System. Note that you will not want materials stacked more than a foot deep as this will create unfavorable conditions for the worms.
4. Choose the Right Space
Ideally, you want your Vermicompost System near the source of waste materials. In a home, this will be near the kitchen while on a farm it may be near manure-producing animals.
Here are a few tips which will help you put your DIY system in the correct place:
- Vermicompost systems usually don’t produce large quantities of unpleasant odors but depending on your food scraps and practices there may be some odors so consider this with placement.
- Keep your Vermicompost System out of direct sunlight and in an area with relatively stable temperatures. The north-facing sides of structures are often ideal since there is less fluctuation.
- Your ideal temperature range is between 55 and 77 degrees Fahrenheit.
- Provide a roofed area out of the rain and protected it from the wind. If covering with plastic or a roof make sure it still gets adequate air circulation.
- Have a lid or a cover to avoid problems with rodents and other pests.
The incorrect placement of your worm bins can result in very little composting happening or your worms dying off. For the first couple of days, you should keep a close eye and be ready to move things around as needed.
5. Choose The Proper Worm Bedding
The bedding is dry material that ensures the proper balance of nutrition, moisture, and physical structure to your Vermicompost System. It is typically placed at the bottom of your worm bin and after the addition of moist or nutrient-rich materials.
Bedding can be made of many materials but should have the following properties.
- High Absorbency – Bedding material should be able to absorb and retain the moisture from the food source. This prevents excessive moisture while also maintaining the much-needed water.
- Provide Porosity – Your bedding material should be light and fluffy, Avoid dense materials or those that pack together tightly.
- Have High Carbon Content – Materials rich in carbon balance out the nitrogen-rich materials that you will be feeding your worms. Materials high in carbon also break down slower so they provide longer-lasting bedding.
Common Bedding Materials
- Shredded Newspaper – This is the most common choice for many home systems. Modern newspapers are printed with biodegradable soy ink and provide great texture for bedding. Avoid glossy papers or those with synthetic inks.
- Cardboard – Shredded or torn to small pieces.
- Coconut Coir – Available at most garden stores.
- Leaves – Shredded into small pieces or partially decomposed.
Wood Shavings- Avoid using too many wood shavings but in small quantities work great. - Straw – Shredding your straw with a weed whacker first provides better material. Avoid hay with seeds.
And just like that, we have a working system! Now, however, the real fun begins and we can start actually cranking out some compost.
Feeding Your Worms
Worms feed on nutrient-rich decomposing organic matter like food scraps or manure. Food is usually given incrementally to worms so they can slowly process it into vermicompost. It is placed on top of dry bedding and sometimes topped with more dry bedding.
What Do Worms Eat?
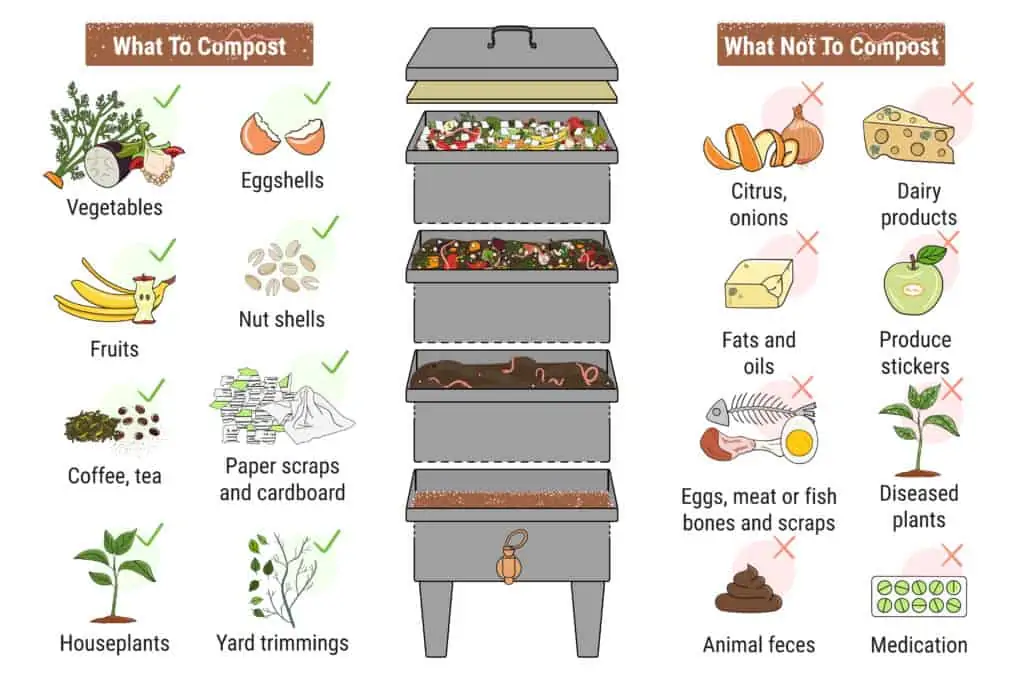
Worms are magnificent at consuming almost any type of organic matter you feed them. Food that is cut into small pieces or blended (like pulp) results in a quicker decomposition and vigorous worms! Materials that inhibit microbial decomposition (like citrus peels) will take longer to decay.
Since worms are such diverse eaters it’s much easier to list what to avoid feeding them.
- Oil and Oily Foods – This includes fried foods, sauces, and dressings.
- Slow to Decompose Materials – This includes citrus peels, onions, avocado pits, and potato peels. It’s good to make observations of materials that don’t break down.
- Liquids or excessively wet food – This could disrupt the moisture levels.
- Meat – This includes bones, skins, and any drippings. This may cause foul odors and attract other pests.
The Vermicomposting Process and System Maintenance
There are different ways to go about actually using your vermicompost system. Depending on which you choose this may alter the design of your system. The proper Vermicompost system is designed to use your worm’s intuition to migrate towards fresh food sources to separate them from the finished material. This way you can harvest it without removing or disturbing excessive amounts of worms.
The Stacking System – This system is recommended for small-scale home Vermicompost systems that utilize containers. For this system, you need two identical containers that can stack directly on top of each other. This system can also be adapted for larger-scale production.
- Lay 6” of bedding on the bottom of the container.
- Place an equal amount of food and worms on top of the bedding. It will take them a while to adjust and become active.
- After a couple of days, you can start feeding your worms about 50-60% of their original weight every day. Cover the food with a bit of bedding after every feeding.
- Once you’ve filled the container to an adequate quantity, place your second container on top with food and bedding. As the food runs out below the worms will move into your new container through the drainage holes leaving only the nutrient-rich vermicompost behind!
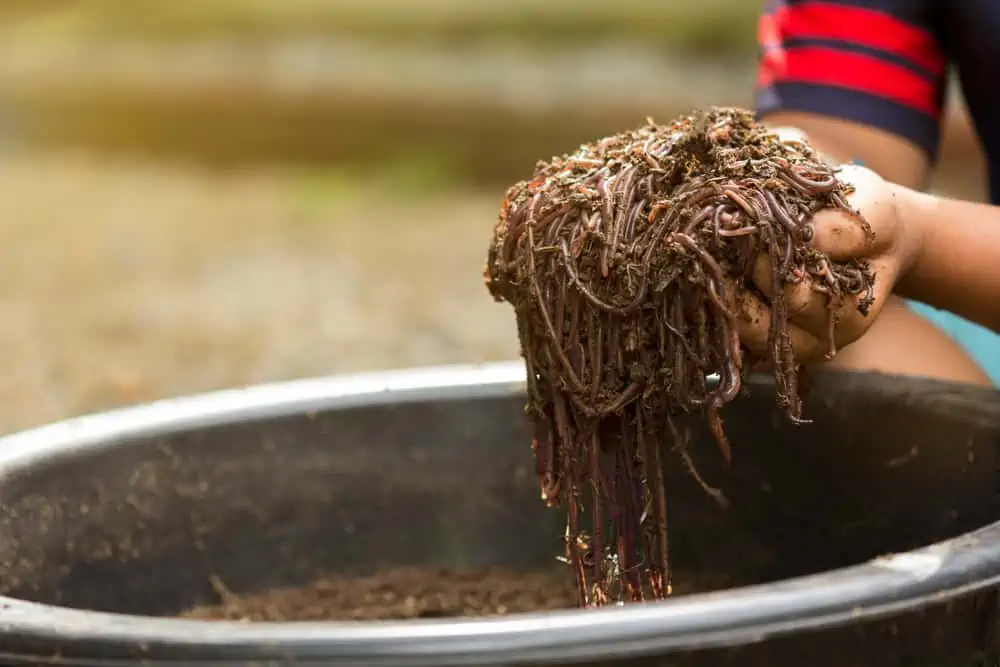
- Harvest and Repeat!
Continuous Flow System – These systems resemble the stacking systems but move the worms horizontally instead of up into a separate container. These systems can be adapted to large tubs or beds for large-scale production.
- Place bedding 6” deep across the surface of the container.
- Place food scraps and worms on one side of the container.
- Slowly keep adding food next to the original pile. The worms should follow the flow of new food.
- Once you’ve reached the other end of your container the worms should have processed the first materials you added. If it’s not, stop feeding your worms for a couple of days or weeks to let them finish.
- Harvest vermicompost and start feeding them adjacent to the unfinished compost.
- Alternatively, you can have two containers next to each other with a permeable wall. This way you can stop feeding one and transfer all your worms over to the next container. You could also place a permeable container with food and bedding directly above the finishing compost to transfer the worms into the new container.
Common Problems With Homemade Worm Bins
Smell
If you’re experiencing foul smells coming from your vermicompost system then you’re likely overfeeding them. Immediately stop feeding them and consider moving excess food to your traditional compost system. If this doesn’t seem to be the issue you may have excess moisture.
Moisture
If your pile is looking too wet then consider mixing in some dry bedding to absorb some of the moisture. You may have to alter your feeding schedule and retrofit your design to provide more drainage.
Pests
Many different mammals and birds love worms, so make sure your container is protected. If you have ants in your bins avoid feeding sugary substances. They are not a serious issue but can be annoying.
Worms Escaping
If your worms are trying to escape they either have poor environmental conditions or are out of food!
How To Use Your Finished Vermicompost
The final joy of Vermicompost Systems is using the rich product that it produces! You can use it just like compost. Either dig it into new beds or add 1-2” of it as a top dressing under your plants of choice. Avoid putting it directly on the stems of plants as it may damage their tissues due to how nutrient-rich it is.
The liquids that drain from your container make epic liquid fertilizers when diluted 10x in water. Don’t use it without dilution or you could damage your plants! It is extremely rich in beneficial microorganisms so it works perfectly for making compost teas or to bring life back into a heavily degraded soil or compost.
One of the best uses for vermicompost is in potting soils for highly valued plants or seed starting. Nurseries often use vermicomposting because it has unparalleled benefits for seed germination and young plants. It can be used instead of compost in your selected soil-mix recipe. Usually, you will use about 25% vermicompost, 25% vermiculite or perlite, and 50% coir or peat moss.
Conclusion
It’s easy, convenient, fun, and produces an amazing product. Even if you use a traditional composting system, working with vermiculture to process some of your organic wastes can be an excellent practice. It will not only save you work but also provide an excellent source of nutrient-rich compost. If you haven’t experimented with designing your own Vermicompost Systems yet, it might just be time to give it a try!
The Best Place to Buy Worms, Worm Bins, and Vermicomposting Materials:
If you’re looking to get started in vermicomposting, going out and digging for worms is not the way to do it. Not only would you waste days of your life, but you’d also be depleting the worm population in the ground you are digging in.
Instead, I rely on Uncle Jim’s Worm Farm for bundles of worms, bins, etc. They’ve been in business for over 40 years and are the best source (in my opinion) for everything vermicomposting. Click here to check them out.